11 Crochet Blanket Edges Ideas for Every Skill Level
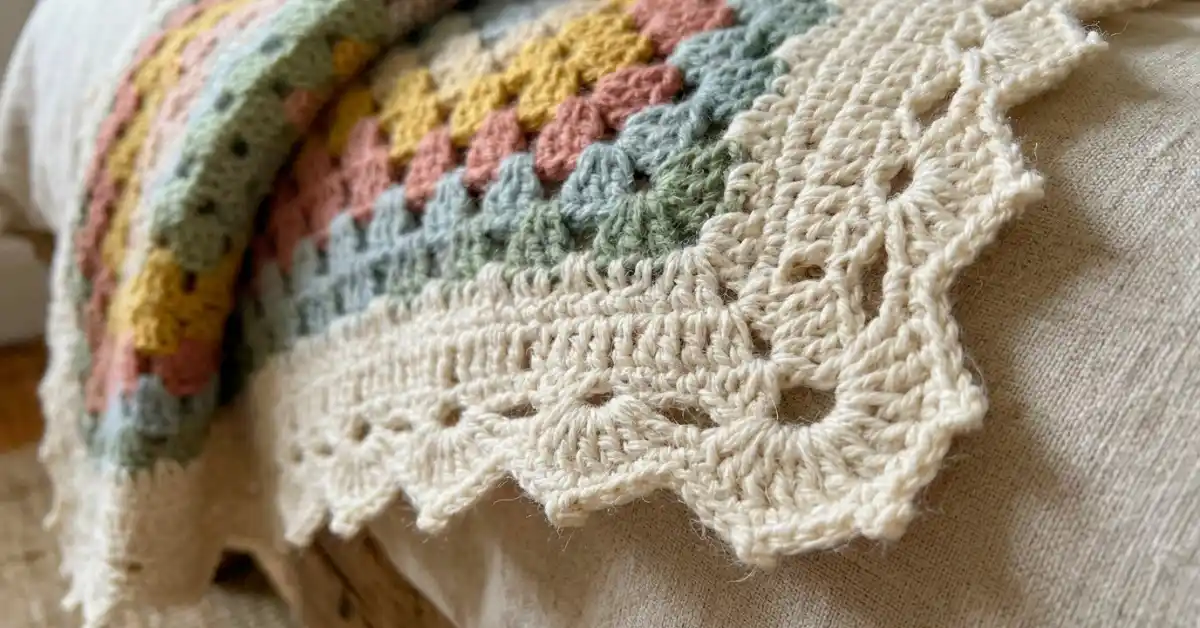
The easiest answer to 11 crochet blanket edges ideas is simple. Start with one round of single crochet, then add a pretty round on top. That one round straightens wobbly sides and gives every other edge something solid to grow from.
I wrote this for anyone with a finished blanket and a bare edge. You get 11 borders, from very simple to a little fancy. Each one has a short free pattern you can follow right here.
My first granny square blanket had edges like a wavy sea. A plain single crochet border calmed them down more than I expected.
Every pattern uses US terms, with UK names in a small table below. You only need your finished blanket, matching yarn and a hook.
At a Glance
- Ideas11 borders
- SkillBeginner to confident beginner
- HookYour blanket hook
- YarnMatch your blanket
- Built on1 Base Round
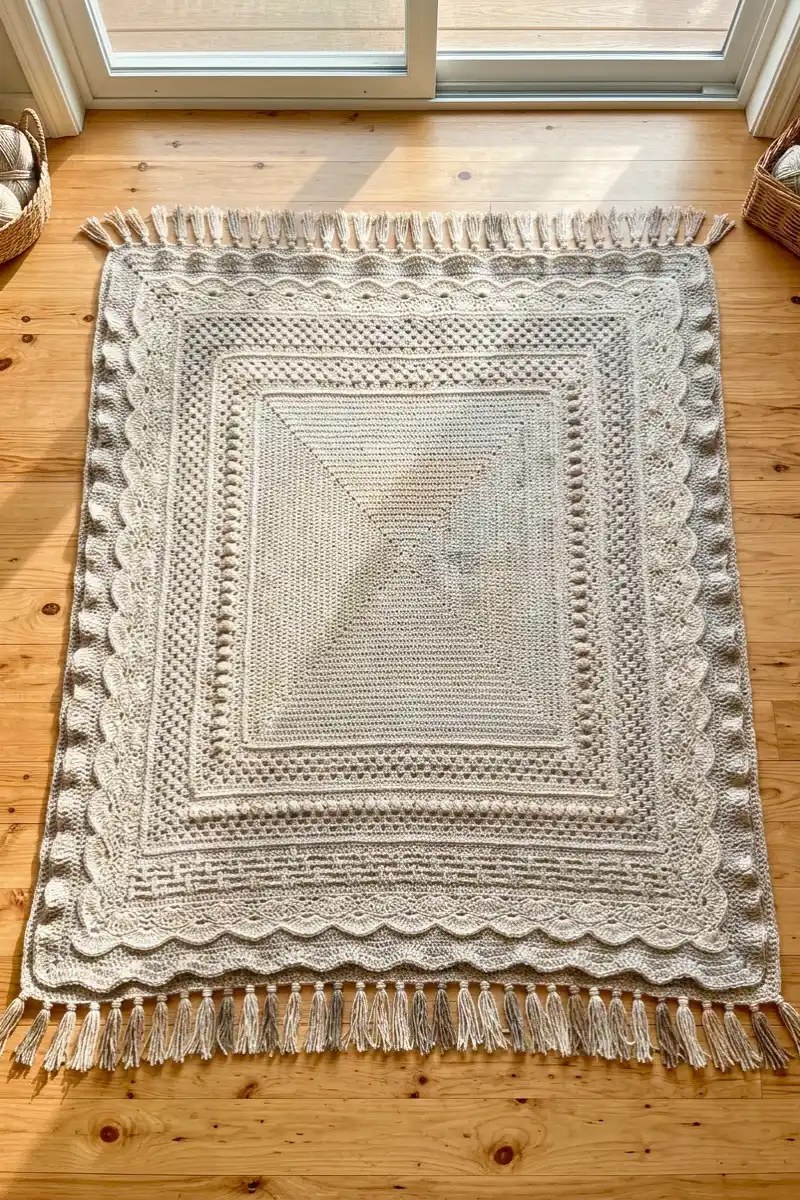
How I Picked These 11 Crochet Blanket Edges Ideas
I chose edges most crocheters can finish with basic stitches. I looked at four things.
- Difficulty: most are beginner friendly, a few need a little counting.
- Yarn use: some edges are light, and a few use a lot.
- Flatness: each one should lie flat when the stitch count is right.
- Giftability: would it look good on a blanket you give away?
I left out bobbles and puffs on purpose. They are lovely, but harder to keep even.
Before You Start: Abbreviations and the Base Round
Every border below sits on one foundation. Work this Base Round first, then pick your edge.
Abbreviations (US terms)
- ch
- chain
- sc
- single crochet
- dc
- double crochet
- sl st
- slip stitch
- Rnd
- round
- BLO
- back loop only
A corner stitch is the middle stitch of the 3 sc you work in each corner. A ch-1 space or ch-2 space is the gap made by that many chains.
| US term (used here) | UK term |
|---|---|
| slip stitch | slip stitch |
| single crochet | double crochet |
| double crochet | treble crochet |
UK names sit one step higher than US names. If a pattern uses a half treble, it is written in UK terms.
Free Pattern: Base Round (Work This First)
- Setup: Pick a stitch in the middle of any side, not a corner. Join yarn with a sl st.
- Rnd 1: Ch 1, sc in the same stitch. Sc in each stitch along the top and bottom edges. Along the sides, work 1 sc in each sc row end, or 2 sc in each dc row end. Work 3 sc in each corner stitch. Join with sl st to the first sc. Do not turn.
- Stitch count: It depends on your blanket, so count each side after Rnd 1.
Lay the blanket flat after Rnd 1. If the edge waves, you used too many stitches. If it pulls in, you used too few.
Planning a shell, V stitch or granny border? Count the stitches between corners while you work Rnd 1. Adding or skipping a stitch is easiest then.
1Free Single Crochet Border Pattern
- Beginner
- Fast
- Blanket hook
This is the simplest edge and the one I reach for most. It straightens the sides and hides small uneven rows.
It works with any yarn weight and any blanket style. Make it in the same color for a quiet finish, or switch colors for a clean frame.
Want a wider border? Repeat Rnd 2 as many times as you like.
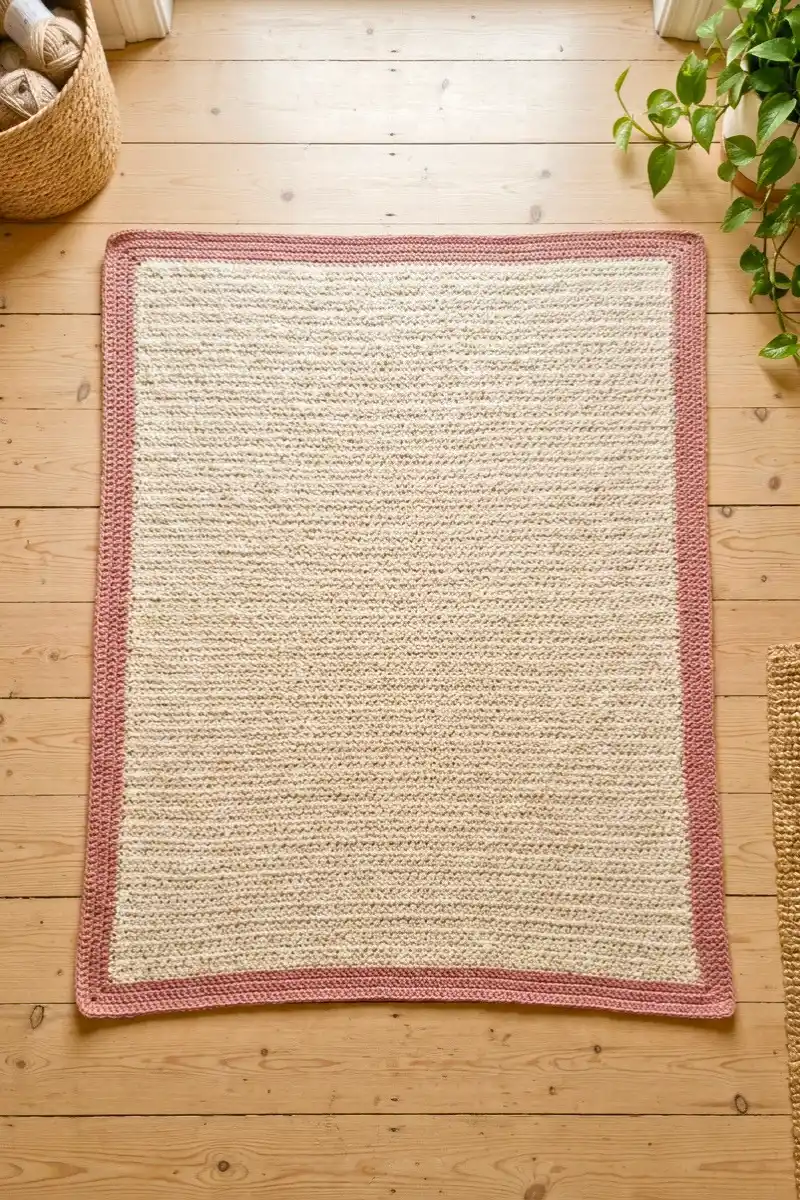
Free Pattern: Single Crochet Border
- Rnd 1: Work the Base Round from the section above.
- Rnd 2: Ch 1, sc in the same stitch as the join. Sc in each stitch around, working 3 sc in each corner stitch. Join with sl st to the first sc.
- Stitch count: Each extra round adds 2 stitches at every corner, so 8 more stitches per round.
- Finish: Fasten off and weave in the end.
2Free Back Loop Ridge Border Pattern
- Beginner
- Fast
- Blanket hook
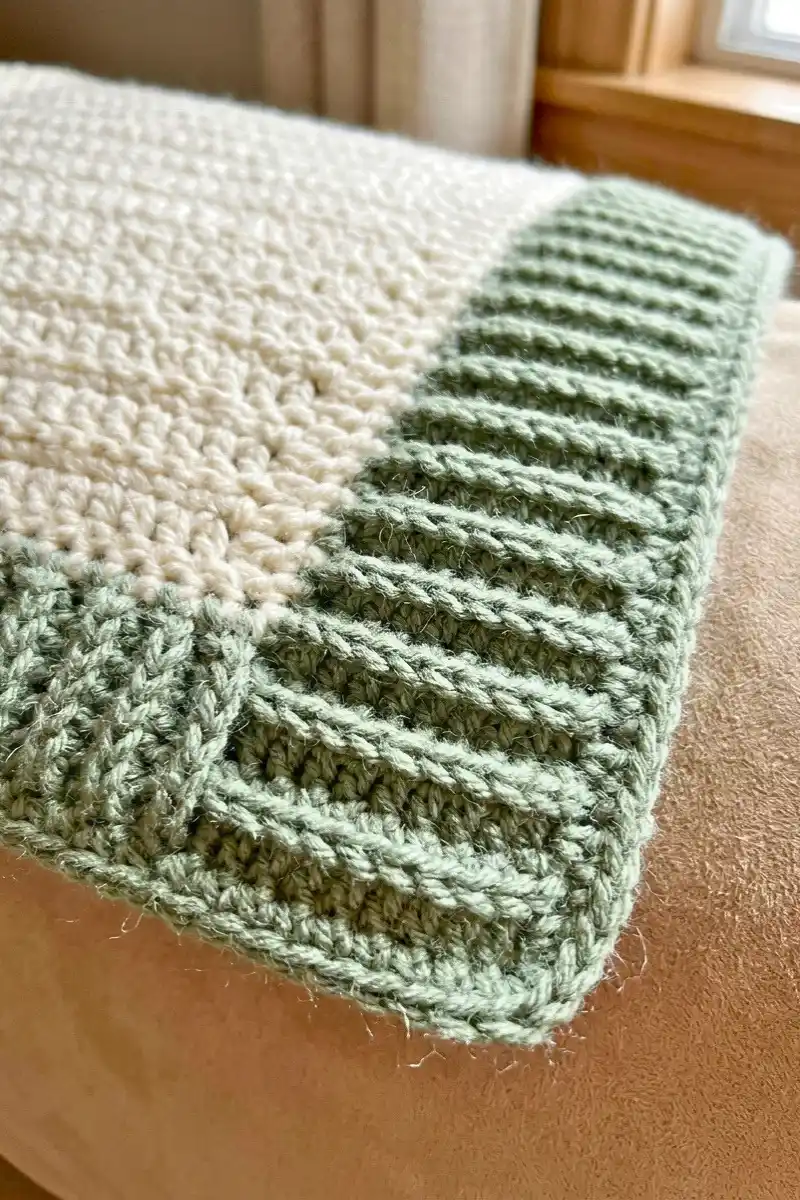
Work this one in the back loop only (BLO). That leaves the front loops untouched and makes a neat ridge along the edge.
The back loop is the one farthest from you at the top of the stitch. It is the same easy stitch, so you get texture without new skills.
It frames a busy stitch pattern nicely and keeps the eye on the blanket.
Free Pattern: Back Loop Ridge Border
- Rnd 1: Work the Base Round.
- Rnd 2: Ch 1, sc in the BLO of the same stitch as the join. Sc in the BLO of each stitch around, working 3 sc in the BLO of each corner stitch. Join with sl st to the first sc.
- Rnd 3 (optional): Repeat Rnd 2 for a deeper ridge.
- Stitch count: Same as the single crochet border, with 2 extra stitches at each corner.
3Free Double Crochet Border Pattern
- Beginner
- Fast
- Blanket hook
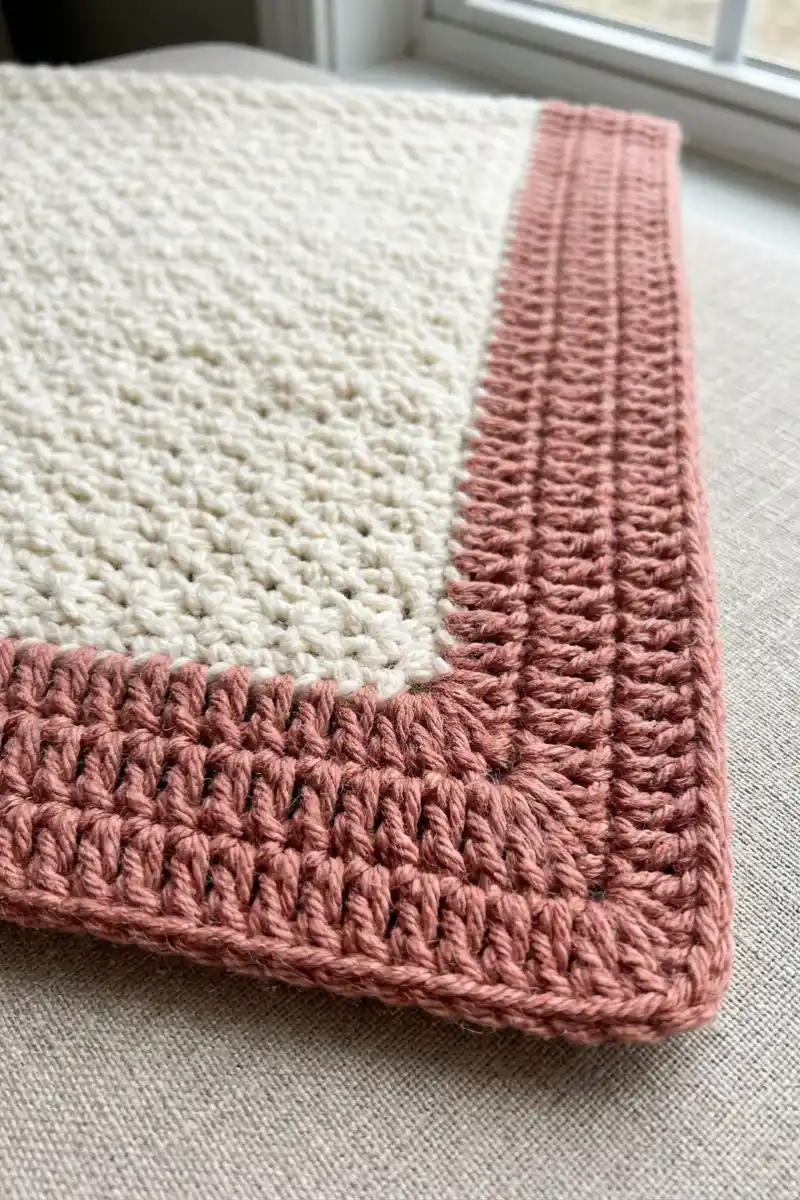
A round of double crochet (dc) is taller and softer than single crochet. It gives a wider edge in one pass.
A couple of dc rounds can make wonky edges look straighter. In UK terms, this is a treble crochet border.
Add a final sc round if you want a tidy closing line.
Free Pattern: Double Crochet Border
- Rnd 1: Work the Base Round.
- Rnd 2: Join yarn in any stitch that is not a corner. Ch 3 (counts as dc). Dc in each stitch around, working 3 dc in each corner stitch. Join with sl st to the top of the ch 3.
- Rnd 3 (optional): Ch 1, sc in the same stitch as the join. Sc in each stitch around, working 3 sc in each corner stitch. Join with sl st to the first sc.
- Stitch count: Rnd 2 has the same number of stitches as Rnd 1, plus 2 extra at each corner.
4Reverse Single Crochet Border (Crab Stitch)
- Easy
- Medium
- Blanket hook
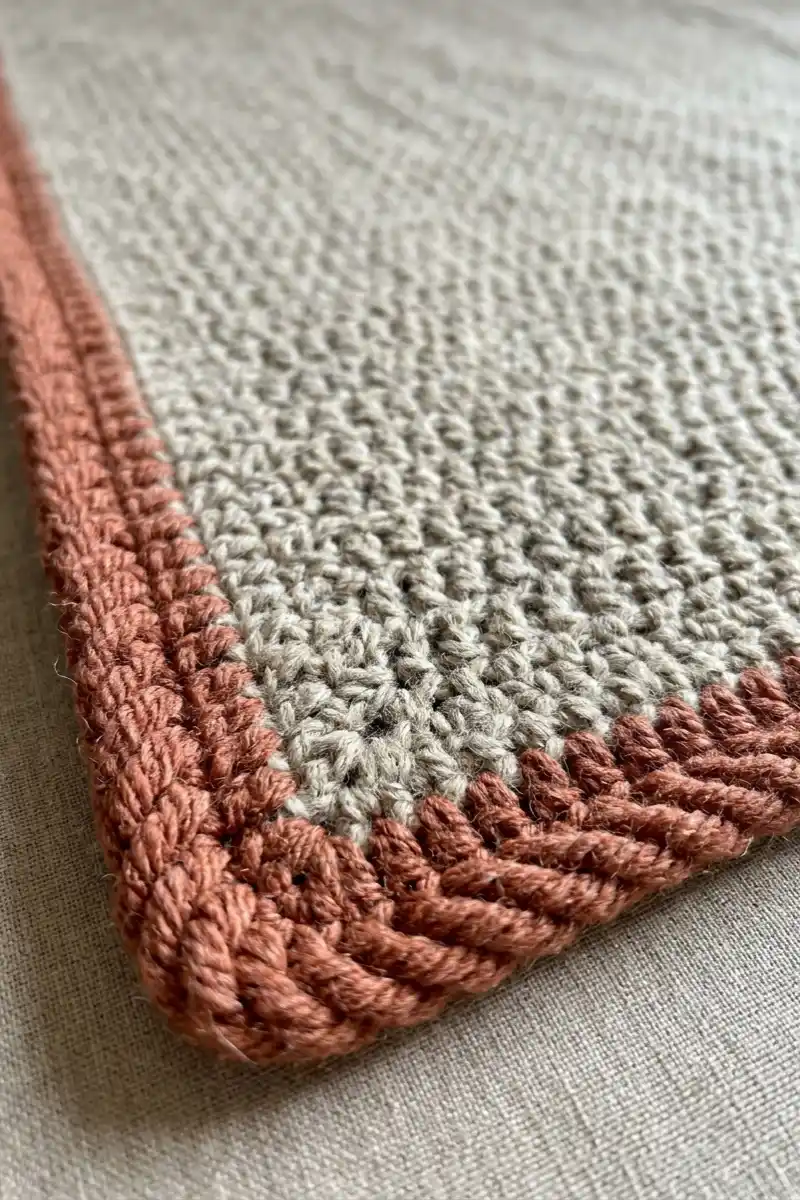
The crab stitch is reverse single crochet. You work single crochet backward, which twists the stitches into a small rope-like edge.
If you are right-handed, work left to right. Left-handers work the other way. Do not turn the blanket.
It feels odd the first time. Go slowly and keep your stitches loose. It works best on a base of single crochet.
Free Pattern: Crab Stitch Border
- Rnd 1: Work the Base Round.
- Rnd 2: Ch 1. Do not turn.
- Crab stitch: Insert the hook, front to back, into the next stitch to the right. Yarn over and pull up a loop. Yarn over and pull through both loops on the hook.
- Repeat: Work 1 crab stitch in each stitch around, including the 3 corner stitches. Join with sl st to the first crab stitch.
- Left-handed: Work the same steps in the opposite direction.
5Free Picot Edging Pattern
- Beginner
- Medium
- Blanket hook
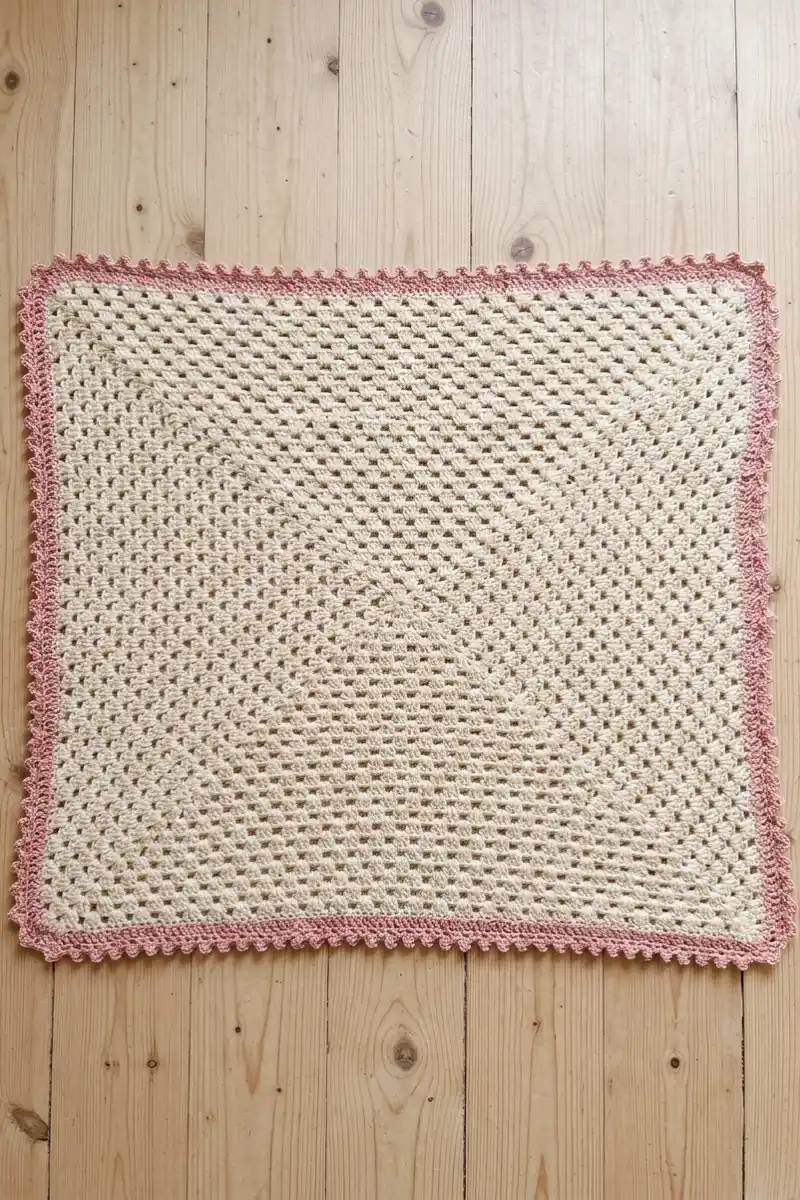
A picot is a tiny loop made from ch 3 and a slip stitch. It adds a light, lacy touch to the edge.
It looks sweet on a gift blanket or a lightweight throw.
Spacing matters. 3 sc between picots is a classic rhythm, and you can nudge it to fit your edge.
Free Pattern: Picot Edging
- Rnd 1: Work the Base Round.
- Picot: Ch 3, then sl st in the first ch you made (the one farthest from your hook).
- Rnd 2: Ch 1. *Sc in each of the next 3 stitches, picot.* Repeat from * around. Join with sl st to the first sc.
- Corners: At each corner, work the picot after the sc in the middle corner stitch.
- Spacing: If the picots do not line up at a corner, work 2 or 4 sc between two picots to adjust.
6Free Shell Stitch Border Pattern
- Confident beginner
- Medium
- Blanket hook
A shell is 5 dc worked in one stitch. Shells in a row make a soft, scalloped edge.
Each shell plus sc repeat uses 6 stitches. That means you need to plan your counts before you start.
Decide on this border while you work the Base Round. It is much easier to add or skip a stitch then.
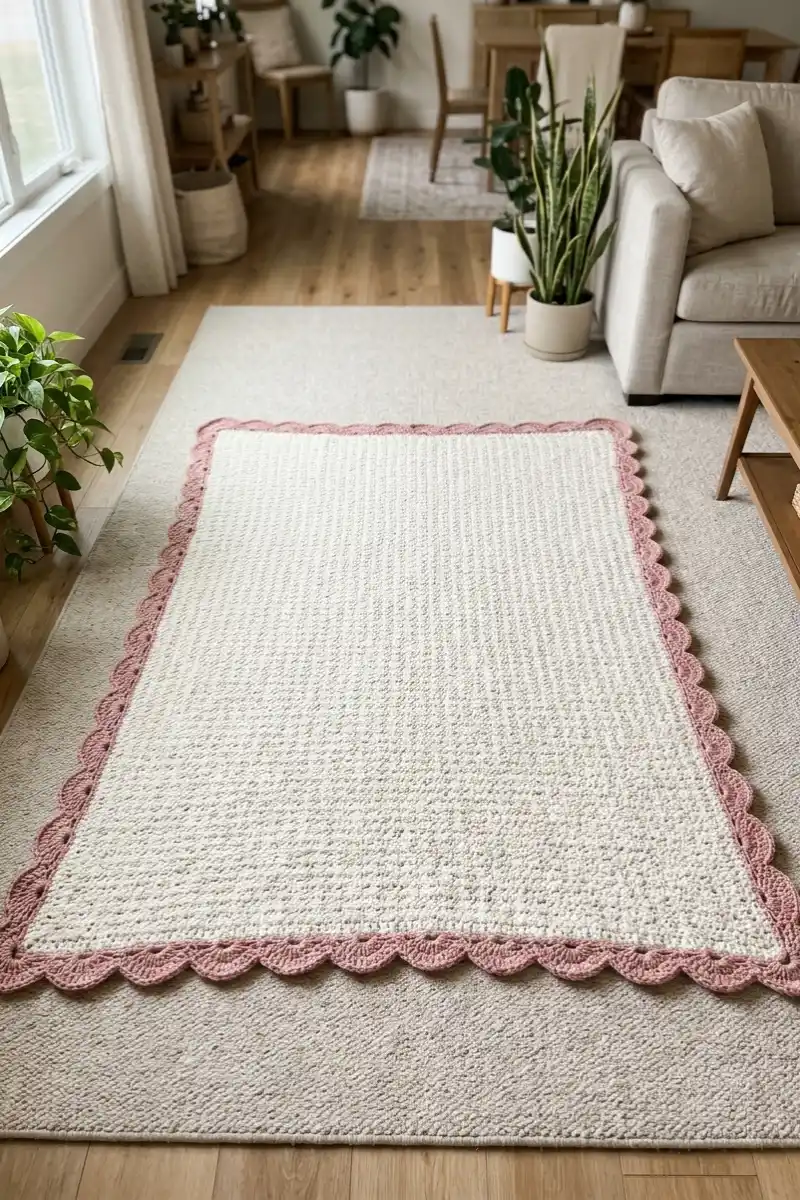
Free Pattern: Shell Stitch Border
- Count first: Count from one corner stitch up to, but not including, the next corner stitch. You want a multiple of 6, such as 30, 36 or 42.
- Rnd 1: Work the Base Round. If your count is off by 1 or 2, work 2 sc in one stitch or skip one stitch.
- Rnd 2: Join yarn in any corner stitch. Ch 3 (counts as dc), 4 dc in the same stitch. First shell made (5 dc).
- Rnd 2 (repeat): *Skip 2 stitches, sc in the next stitch, skip 2 stitches, 5 dc in the next stitch.* Repeat from * around. The 5 dc will land in each corner stitch.
- Last repeat: Skip 2 stitches, sc in the next stitch, skip 2 stitches. Join with sl st to the top of the ch 3.
7Free V Stitch Border Pattern
- Confident beginner
- Medium
- Blanket hook
A V stitch is (dc, ch 1, dc) worked in the same stitch. Repeated along an edge, it makes a light, airy border.
You skip 2 stitches between Vs, so each V uses 3 stitches. Count the sides first, just like the shell border.
It looks great in a contrast color on a solid blanket.
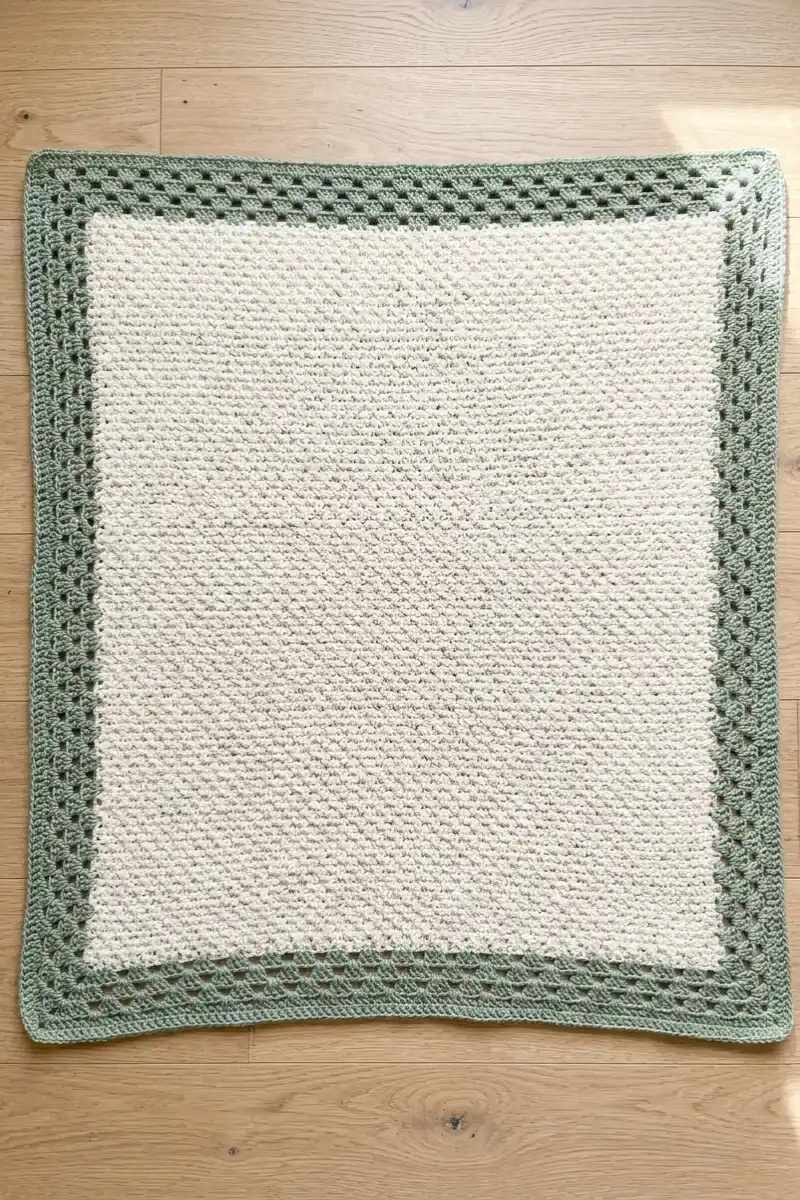
Free Pattern: V Stitch Border
- Count first: Count from one corner stitch up to, but not including, the next corner stitch. You want a multiple of 3, such as 33, 39 or 45.
- V: (Dc, ch 1, dc) in the same stitch.
- Rnd 2: Join yarn in any corner stitch. Ch 3 (counts as dc), ch 1, dc in the same stitch. Ch 1, (dc, ch 1, dc) in the same stitch. First corner made.
- Rnd 2 (sides): *Skip 2 stitches, V in the next stitch.* Repeat across the side until 2 stitches remain before the next corner stitch. Skip 2 stitches. Work V, ch 1, V in the corner stitch.
- Repeat: Work the sides and corners around. After the last side, skip 2 stitches and join with sl st to the 3rd ch of the beginning ch 3.
- Example: 33 stitches from corner to corner gives 10 Vs along each side, between the corner Vs.
8Free Granny Stitch Border Pattern
- Confident beginner
- Medium
- Blanket hook
A granny stitch border is made of 3 dc clusters. It echoes a granny square, so it is a natural match for a granny square afghan.
Over a round of sc, each cluster uses 3 stitches: skip 2, then 3 dc in the next. The corners get (3 dc, ch 2, 3 dc).
Already ending on a granny round? Skip the Base Round and work into the spaces. Use (3 dc, ch 2, 3 dc) in each corner space and ch 1, 3 dc in each ch-1 space on the sides.
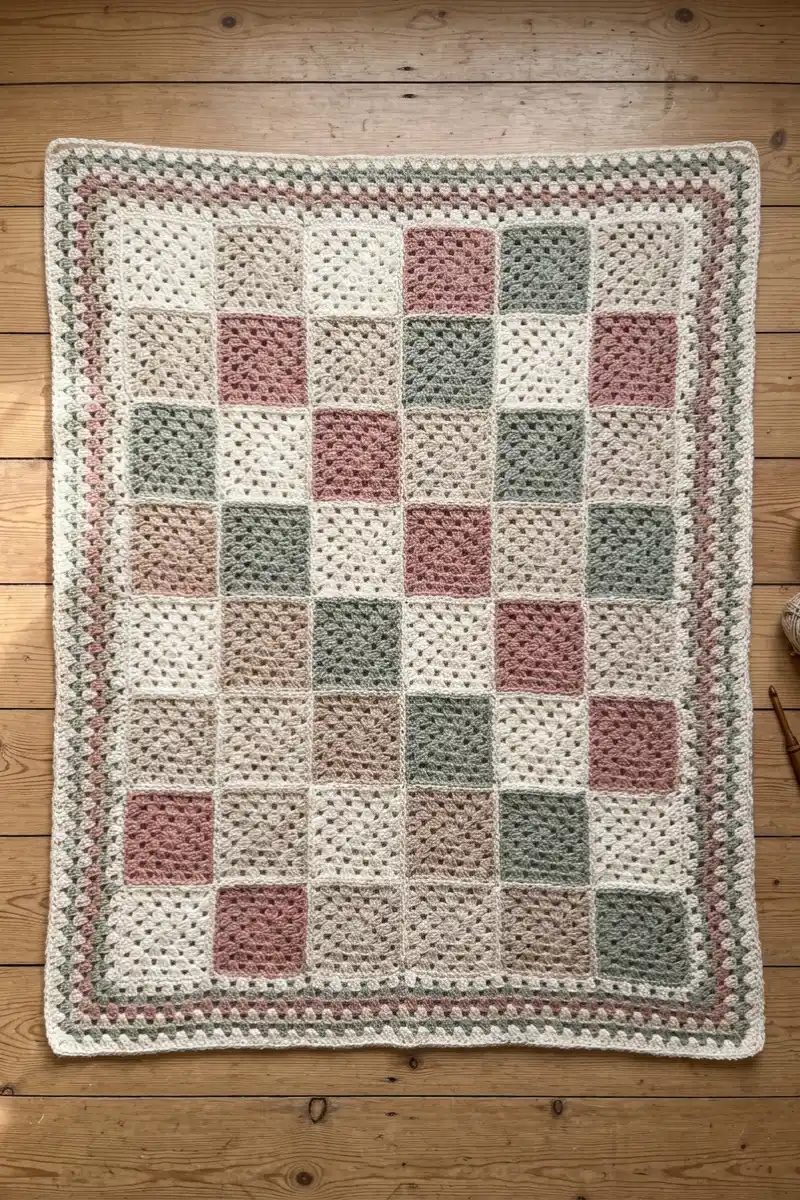
Free Pattern: Granny Stitch Border
- Count first: Count from one corner stitch up to, but not including, the next corner stitch. You want a multiple of 3.
- Rnd 1: Work the Base Round.
- Rnd 2: Join yarn in any corner stitch. Ch 3 (counts as dc), 2 dc, ch 2, 3 dc in the same stitch. First corner made.
- Rnd 2 (sides): *Ch 1, skip 2 stitches, 3 dc in the next stitch.* Repeat across the side until 2 stitches remain before the next corner stitch. Ch 1, skip 2 stitches. Work (3 dc, ch 2, 3 dc) in the corner stitch.
- Repeat: Work the sides and corners around. After the last side, ch 1, skip 2 stitches and join with sl st to the top of the beginning ch 3.
- Rnd 3 (optional): Sl st in each of the next 2 dc and into the ch-2 corner space. Ch 3 (counts as dc), 2 dc, ch 2, 3 dc in the same space. *Ch 1, 3 dc in the next ch-1 space.* Repeat across the side to the next corner. Ch 1, then work (3 dc, ch 2, 3 dc) in the corner space. Work around, then ch 1 and join with sl st to the top of the ch 3.
9Crossed Double Crochet Border
- Confident beginner
- Medium
- Blanket hook
Crossed double crochet makes a little X texture along the edge.
It works over 2 stitches at a time, so you need an even number of stitches along each side.
It is a good pick if you want texture without holes.
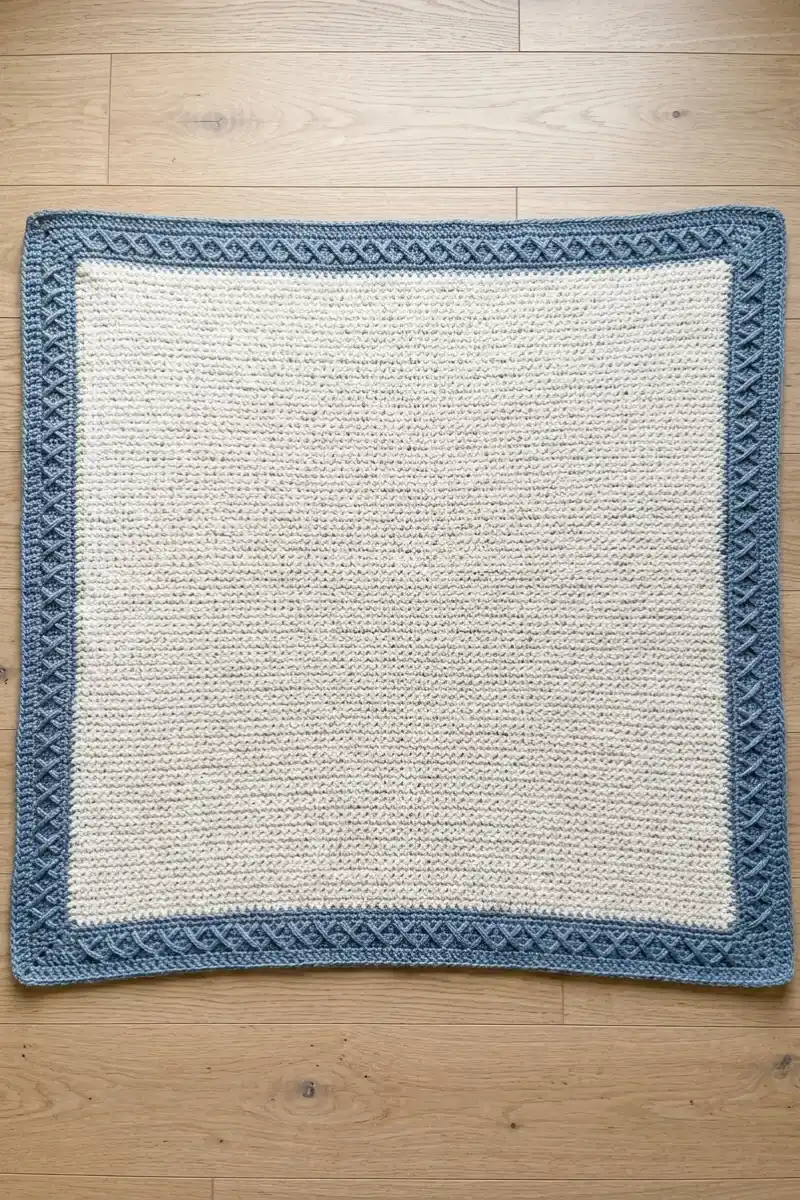
Free Pattern: Crossed Double Crochet Border
- Crossed dc: Skip 1 stitch, dc in the next stitch. Then dc in the skipped stitch, working behind the dc you just made. You can also work in front, just stay consistent.
- Count first: The number of stitches between two corner stitches, not counting the corner stitches, should be even.
- Rnd 1: Work the Base Round.
- Rnd 2: Join yarn in any corner stitch. Ch 3 (counts as dc), 2 dc in the same stitch. First corner made.
- Rnd 2 (sides): Work crossed dc across the side until you reach the next corner stitch. Work 3 dc in the corner stitch.
- Repeat: Work the sides and corners around. After the last side, join with sl st to the top of the ch 3.
10Free Ruffle Border Pattern
- Beginner
- Medium
- Needs extra yarn
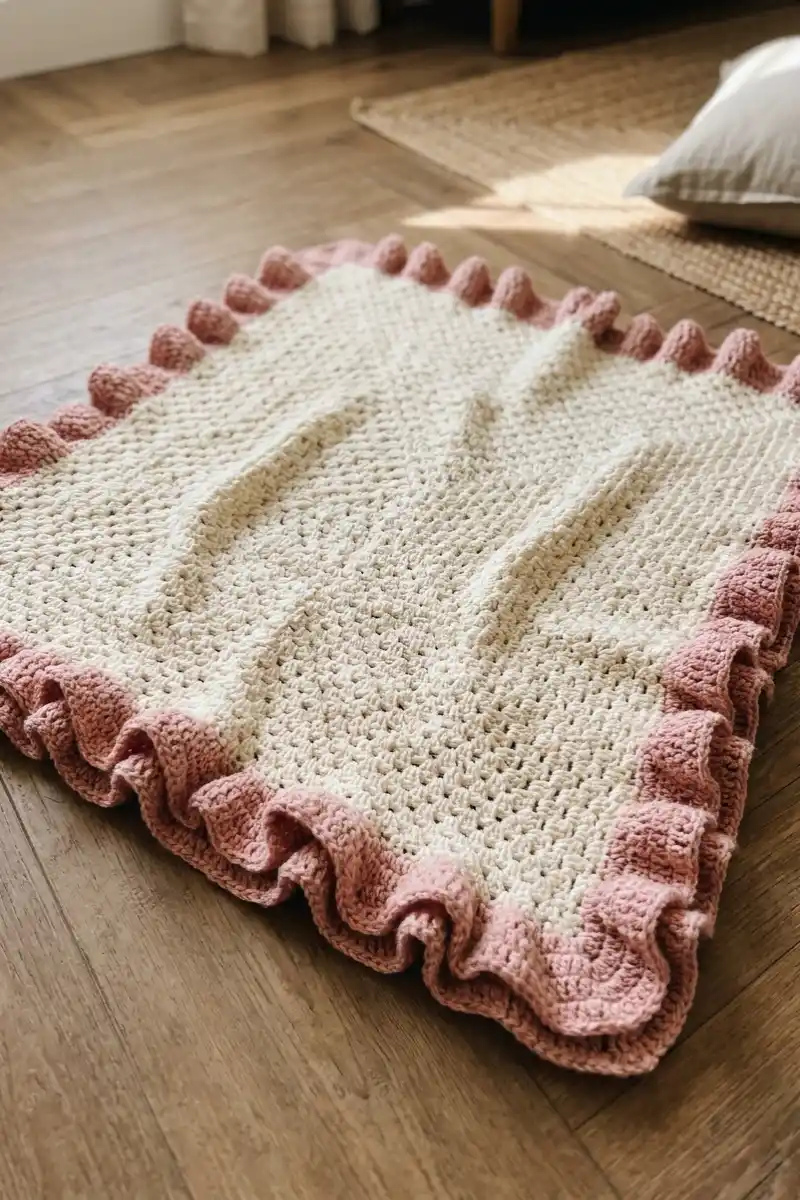
A ruffle border is dc with extra stitches packed in. Working 2 dc in each stitch pushes the yarn into waves.
My daughter calls this one the fancy edge and claims the blanket whenever it is on the couch.
Ruffles use much more yarn than a flat edge, because the stitch count doubles.
Free Pattern: Ruffle Border
- Rnd 1: Work the Base Round.
- Rnd 2: Join yarn in any stitch that is not a corner. Ch 3 (counts as dc), dc in the same stitch. Work 2 dc in each stitch around, including the corner stitches. Join with sl st to the top of the ch 3.
- Stitch count: The count doubles. If Rnd 1 has 100 stitches, Rnd 2 has 200 dc.
- Fuller ruffle: Work 4 dc in each stitch instead.
11Fringe Edging for Blankets
- Beginner
- Slow
- Hook to pull loops
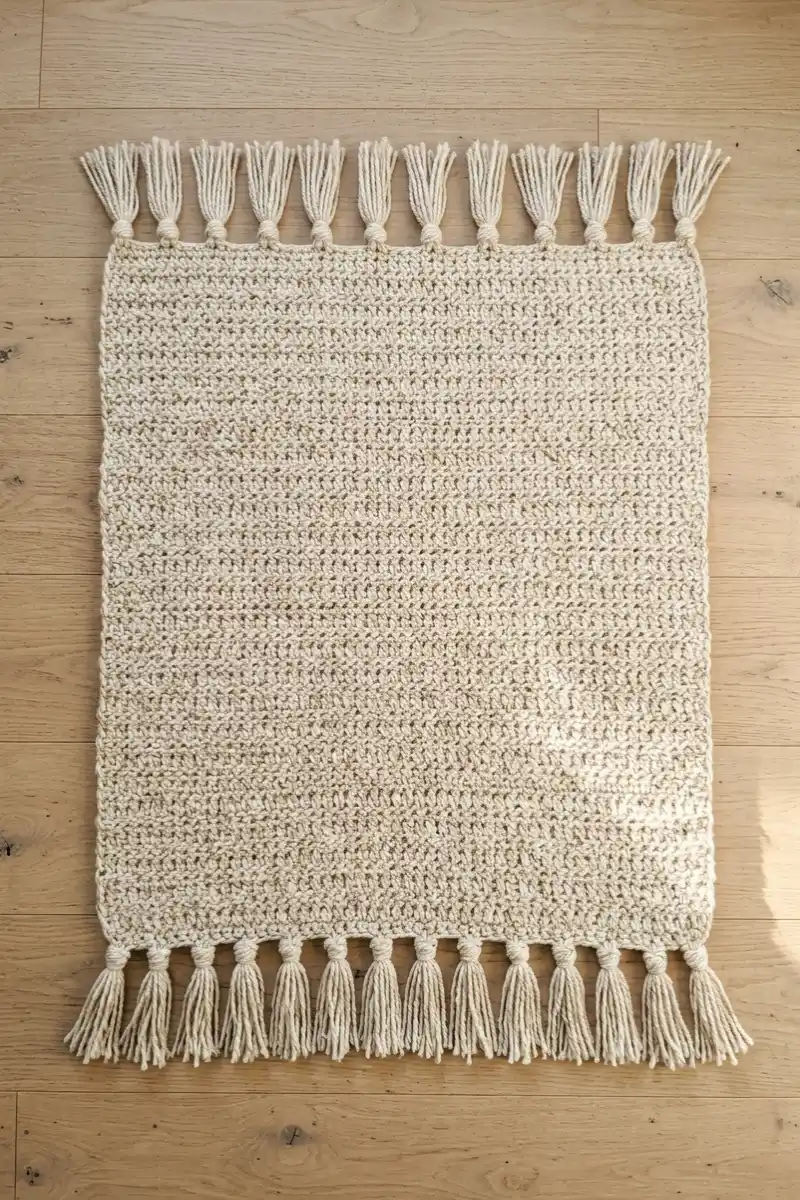
Fringe adds movement and texture, and it needs no stitch counting.
Cut strands about twice the length you want, plus a little extra for the knots.
Put it on the two short ends, or on all four sides for a full look.
Free Pattern: Fringe Edging
- Cut: For 6 in (15 cm) fringe, cut strands about 12 in (30 cm) long. Use 3 strands per tassel as a starting point.
- Fold: Fold the strands in half to make a loop.
- Attach: Insert your hook through an edge stitch. Catch the folded loop and pull it partway through. Pull the cut ends through the loop. Tighten gently.
- Repeat: Space the tassels evenly along the edge.
- Trim: Trim the ends even when you finish.
Quick Comparison of These Crochet Blanket Edges
| Edge | Skill | Time | Yarn use | Best for |
|---|---|---|---|---|
| Single crochet | Beginner | Fast | Low | Straightening any blanket |
| Back loop ridge | Beginner | Fast | Low | A raised line of texture |
| Double crochet | Beginner | Fast | Medium | A wider, softer edge |
| Crab stitch | Easy | Medium | Low | A rope-like finish |
| Picot | Beginner | Medium | Low | A light, lacy touch |
| Shell | Confident beginner | Medium | Medium | A soft scalloped edge |
| V stitch | Confident beginner | Medium | Medium | A light, airy frame |
| Granny stitch | Confident beginner | Medium | Medium | Granny square afghans |
| Crossed double crochet | Confident beginner | Medium | Medium | Texture without holes |
| Ruffle | Beginner | Medium | High | A bold, frilly look |
| Fringe | Beginner | Slow | High | A relaxed, tassel look |
Which One Should You Make First?
- If you want a fast win, start with the single crochet border.
- If your sides look wonky, try the double crochet border.
- If you made a granny square afghan, start with the granny stitch border.
- If you want soft and pretty, pick the shell or picot border.
- If you want a big statement, go for the ruffle or fringe.
Tips for All of Them
Yarn and hook
Use the same yarn weight as your blanket. It is the easiest way to avoid a wavy edge.
For worsted weight (yarn weight 4), the Craft Yarn Council suggests a 5.5 to 6.5 mm hook, or US I-9 to K-10.5.
Stitch count and tension
Too many stitches make a border ruffle. Too few make it pull or cup.
A hook change can help. Go up a size if the edge pulls, and down a size if it ruffles.
I count the stitches on each side at the kitchen table, with a pencil and a sticky note. It takes a few minutes and saves me from ripping out a whole round.
Keep the border in proportion with the blanket. A very wide border can pull the eye away from your blanket.
Finishing
Fasten off, then weave in the ends with a tapestry needle. Check your yarn label for washing instructions before the first wash.
Care for your hands
Long border rounds can tire your hands. Take short, frequent breaks and keep a relaxed grip, which Mayo Clinic suggests to lessen stress on the hands and wrists. If your hands tingle or go numb, see a healthcare professional.
Gifts and baby blankets
A blanket with a pretty edge makes a lovely present. Here are more crochet birthday gift ideas to go with it.
Making a blanket for a baby? The NIH Safe to Sleep campaign says to keep blankets and soft items out of a baby’s sleep area, as its safe sleep guide explains. Use a crocheted blanket for awake time with an adult watching, and ask the child’s doctor if you are unsure.
Frequently Asked Questions
What is the easiest border for a crochet blanket?
A single crochet border is the easiest. Work 1 sc in each stitch along the top and bottom and 3 sc in each corner stitch. Along the sides, work 1 sc per sc row end or 2 sc per dc row end.
How many stitches should I work along the side of a blanket?
Work about 1 sc in each sc row end and 2 sc in each dc row end. Adjust until the edge lies flat. Ruffles mean too many stitches, and pulling means too few.
How do I stop my crochet blanket border from ruffling?
Use fewer stitches along the sides. Take out the round and rework it with fewer stitches. A smaller hook can also help.
What is the best border for a granny square afghan?
A granny stitch border matches the squares. Work (3 dc, ch 2, 3 dc) in each corner and clusters of 3 dc along the sides. A round of single crochet first gives the edge a steady base.
How do I turn the corners on a crochet blanket border?
Work 3 stitches in the corner stitch. That gives the yarn room to turn and keeps the corner square. For the shell, V stitch and granny borders, use the corner steps in each pattern above.
Should the border use the same yarn as the blanket?
Using the same yarn weight is the easiest way to avoid a wavy edge. A contrast color works fine if the weight matches. If the edge ripples, change your hook size.
What is the crab stitch in crochet?
The crab stitch is reverse single crochet. You work single crochet backward, left to right if you are right-handed, without turning. It makes a small rope-like edge.
Pick One Edge and Start Hooking
Pick one edge and try it on a small swatch first. You will know the stitch count before you touch the real blanket.
New to borders? Begin with the single crochet border. Save these ideas on Pinterest so you can find them when the next blanket is done.
Read alsoCrochet souvenirs gift ideas
Save this for later
Follow on Pinterest